
In the world of VFX compositing, turning a green screen into a clean plate is an art. It combines creativity with technical skills. This guide aims to make visual effects easier to understand.
We’ll share key techniques and tools used in post-production. You’ll learn how to get clean plates from green screens. These clean plates make stories come alive. Let’s dive into the details, making complex ideas simple and fun.
Key Takeaways
- Understanding the significance of green screen setups in VFX compositing.
- Techniques to achieve immaculate clean plates for seamless integration.
- The essential tools and software for effective post-production.
- The impact of lighting on compositing quality and visual appeal.
- Challenges in the compositing process and strategies to overcome them.
- Exploring real-world applications and successful projects in visual effects.
Understanding the Basics of Compositing
Compositing is key in VFX, blending different visuals into one image. It involves layering, masking, and mixing various elements. Learning these compositing techniques helps tell stories better, a goal for all filmmakers.
Layering is essential for combining images, videos, and graphics. Each layer adds depth and complexity to the scene. Masks help decide what parts of a layer show up, allowing us to focus on certain areas.
This mix of elements creates both visuals and stories. By using compositing wisely, we make stories that touch viewers deeply. Knowing the basics helps us create worlds that feel real and amazing.
The Role of Green Screen in VFX
Green screens are key in VFX, making it easy to mix different backgrounds and foregrounds. Chroma keying removes the green background, starting amazing visual stories. This part looks into chroma keying’s details, like color sampling and edge blending, which are vital for top-notch visuals.
What is Chroma Keying?
Chroma keying is a major VFX technique used in movies, TV, and digital content. It focuses on a specific color, usually green, to change scenes. This method isolates the green color in footage, allowing for new backgrounds or images, which boosts creative storytelling.
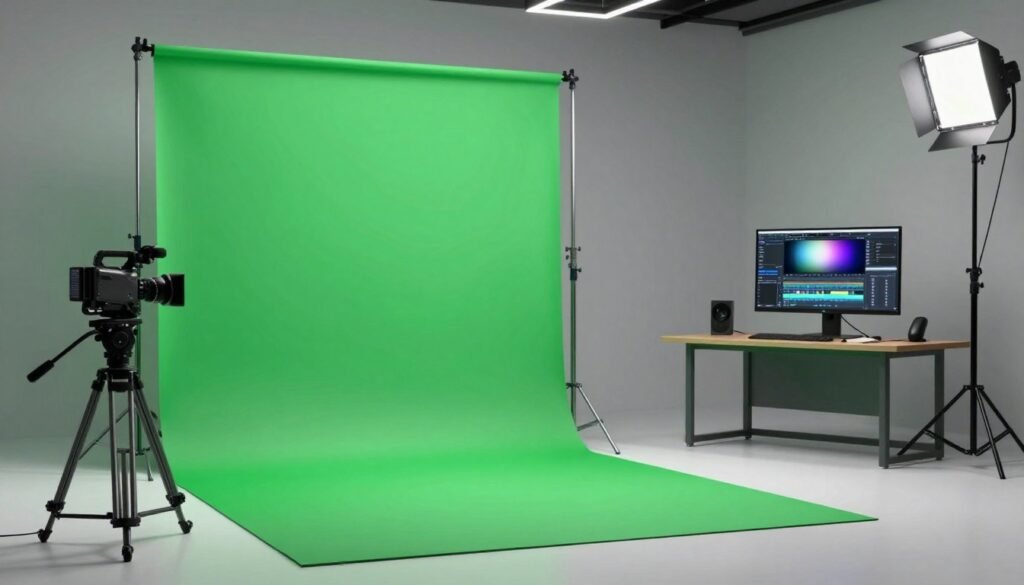
Tips for Effective Green Screen Setup
To get the most from a green screen, setting it up right is key. Here are some important tips:
- Lighting: Even lighting is essential. Stay away from harsh shadows that mess up the keying.
- Fabric Choice: Pick a green screen fabric with a steady color and texture. It helps with even chroma keying.
- Camera Settings: Make sure ISO levels and white balance are correct. This keeps your recordings clear and high-quality.
Techniques for Achieving Clean Plates
Clean plates are key in our compositing work. They give us a clear background to work with. This makes it easier to add visual effects without distractions.
Knowing how to get clean plates well is important. It lets us replace backgrounds or remove unwanted parts easily.
To get the best clean plates, try these methods:
- Plan your shots: Think about the background you want and the frame. A good plan saves time in editing.
- Use consistent lighting: Light the scene evenly. This makes it easier to blend visual effects later.
- Stabilize your camera: Use a tripod or stabilizer. A steady camera ensures your clean plate fits perfectly with other elements.
- Use a neutral color palette: Film against a simple background. This makes it easier to blend with other visual effects.
Adjustments in post-production can also improve clean plates. Use VFX compositing techniques like color correction and noise reduction. These steps help remove flaws, making backgrounds ready for use.
The Importance of Lighting in Compositing
Good lighting in compositing is key for realistic results, like with green screens. It makes sure everything looks right together. We need to pay attention to shadows, reflections, and how bright things are.
Lighting Techniques for Green Screens
Using the right green screen lighting techniques helps avoid bad effects. Here are some important tips:
- Light Placement: Put lights at an angle to avoid shadows on the green screen.
- Color Temperature: Pick lights that match in color to keep skin tones and background colors the same.
- Diffusion: Use softeners to make light gentler, reducing harsh shadows and wrapping light around subjects.
- Backlighting: Backlighting helps subjects stand out from the background, adding depth to VFX.
By following these tips, we can make sure our green screen footage is top-notch. This makes compositing in post-production much easier.
Introduction to Rotoscoping
Rotoscoping is key in making animations look real and stunning. It involves tracing over live-action footage, frame by frame. This lets artists add animated elements that look like they belong. It’s a way to bring stories to life through visuals.
What is Rotoscoping?
Rotoscoping is a way to make animations look real by tracing over live-action footage. It lets artists add animated parts that fit right in. This technique is great for projects needing exactness and realism.
Best Practices for Rotoscoping
To get the best out of rotoscoping, follow some key practices. Here are tips to improve your skills:
- Use High-Quality Footage: Start with clear images for better tracing.
- Employ the Right Tools: Use software like Adobe After Effects and Nuke for rotoscoping.
- Maintain Consistency: Keep style and motion consistent for a unified look.
- Practice Patience: Rotoscoping takes time; take breaks to stay creative.
- Experiment with Techniques: Try different methods to find the best fit for each project.
The Process of Tracking in VFX
In visual effects, tracking is key to blending animated elements with live-action footage. It’s important to know the different tracking techniques to pick the right one for our project. Let’s look at two main types: 2D tracking and 3D tracking.
Types of Tracking Techniques
There are two main types of tracking techniques:
- 2D Tracking: This method tracks an object’s movement in two dimensions. It’s great for stabilizing footage or adding elements without depth.
- 3D Tracking: This advanced method uses spatial data for three-dimensional alignment. It helps place objects in scenes correctly, making visuals more immersive.
How to Use Tracking in After Effects
After Effects tracking makes it easy to use these techniques. Here’s a simple guide:
- First, import your footage into After Effects.
- Then, pick the layer you want to track.
- Go to the Tracker panel and choose Track Motion for 2D or 3D Camera Tracker for 3D.
- Adjust the tracking points for better results.
- Start the tracking and wait for After Effects to process the data.
- After it’s done, apply the data to a new or existing layer to see the effect.
Using After Effects tracking helps us create stunning visual effects that grab the audience’s attention.
VFX Compositing: Software Overview
Choosing the right software for compositing is key to a project’s success. Nuke software and After Effects are top choices, each with its own strengths. Knowing what each offers helps us pick the best tool for our needs.
Comparing Nuke and After Effects
Nuke software is known for its powerful, node-based system. It’s perfect for complex compositing tasks. Its design supports advanced VFX work and teamwork.
After Effects, on the other hand, is easy to use. It’s great for beginners in motion graphics and compositing. While it may not have all of Nuke’s features, it’s quick and versatile for many projects.
| Feature | Nuke Software | After Effects |
|---|---|---|
| User Interface | Node-based, complex | Layer-based, intuitive |
| Best For | Advanced VFX projects | Motion graphics and quick edits |
| Collaboration | Highly collaborative | Limited team features |
| Rendering Speed | Optimized for render | Slower for complex compositions |
Choosing the Right Software for Your Project
Deciding on VFX software depends on your project’s goals. For top-notch visual effects, Nuke software is the way to go. But for quicker, easier work, After Effects is a better fit. Understanding your project’s needs helps choose the right tool for success.
Color Grading Techniques for Compositing
Color grading is key in making VFX compositing look great. It helps set the mood and tone of a project. By changing colors, we make scenes come alive and fit together perfectly.
Effective color grading techniques include:
- Color Correction: Adjust the overall balance of colors to ensure consistency across the footage.
- Saturation Adjustments: Fine-tune the intensity of colors to evoke specific emotions or highlight key elements.
- Matching Color Schemes: Use tools to align the colors of foreground and background elements, creating a unified presentation.
These methods are essential for improving visuals and storytelling. They keep the audience interested. In today’s world, knowing how to color grade is a must for VFX compositing pros.

Advanced Compositing Techniques
Exploring advanced compositing techniques is key. It helps us blend 3D elements into our work. This adds depth and quality to our visuals. It makes our stories more engaging.
Using 3D Elements in Compositing
3D elements can make our work richer. We use tools like Cinema 4D or Blender to create these elements. Then, we adjust lighting and shadows to fit the scene.
This ensures a smooth blend. It makes the scene feel more real and immersive.
Working with Visual Effects Layers
Using multiple visual effects layers helps us build complex scenes. Each layer has its own role. It could be for atmosphere, interest, or movement.
By organizing and blending these layers well, we create a polished final product. It shows our technical and artistic skills.
Common Challenges in Compositing and How to Overcome Them
Compositing in visual effects has many challenges. These can slow down creativity and lower the quality of the final product. Knowing these challenges in compositing is key to solving VFX problems. Issues like mismatched lighting, green spill, and edge fringing can ruin the scene’s smooth look.
To solve these problems, we use various techniques. Making sure all elements have the same lighting makes the composite look real. Overcoming issues with green spill means adjusting chroma key settings to remove unwanted colors. Edge fringing is fixed by precise rotoscoping and using matte creation to define edges.
Practical strategies can greatly improve workflow. Here are some important solutions:
- Check lighting during shooting to avoid later changes.
- Use spill suppressors to handle green spill well.
- Apply edge refinement tools in your compositing software to fix fringing.
By being proactive and using these strategies, we can face challenges in compositing with confidence. This ensures our VFX projects meet the high standards audiences expect.
Exporting Your Composited Work
The final step in bringing your project to life is exporting your composited work. It’s important to pick the right file formats to keep your visuals sharp. Whether for cinema or online, the right format ensures your work looks great everywhere.
Choosing the right file format is key. It helps us balance quality and size. This way, our VFX projects can impress in any setting.
Choosing the Right Format
Knowing the common file formats is a must. Here are some top picks:
| File Format | Best for | Quality | File Size |
|---|---|---|---|
| ProRes | Cinema and Broadcast | High | Large |
| H.264 | Web and Online Sharing | Medium | Small |
| PNG | Images with Transparency | High | Medium |
| TIFF | High-Quality Prints | Very High | Large |
Each format has its own use. Knowing this helps us make better choices in VFX. It ensures our projects look their best, no matter where they’re shown.
Real-World Applications of Compositing in Film
Compositing is key in modern movies, helping directors mix different elements into one picture. It’s not just about layering images; it creates amazing, believable worlds. Movies like “Avatar” and “The Avengers” show how important compositing is for telling stories through pictures.
CGI characters and fantastical landscapes need advanced compositing to look real. This method makes movies look better and pulls viewers into the story. It’s all about creating an unforgettable experience.
In “Jurassic Park,” compositing made dinosaurs look real, making actors’ reactions genuine. As technology gets better, we’ll see even more amazing uses of compositing in movies.

Case Studies: Successful Compositing Projects
Diving into case studies in compositing shows us the world of VFX. Each successful project teaches us about the methods used and the creative problem-solving. For example, films like “Avatar” and “The Jungle Book” mastered compositing. They used advanced techniques to mix live action with digital environments.
These case studies show challenges like blending digital elements smoothly. They also highlight keeping a consistent look. The teams found creative solutions to these problems. This made sure each frame was captivating and told a story.
Creative breakthroughs come from teamwork. This shows how different views can improve a project. Case studies in compositing will inspire future VFX artists. They will fuel their passion and innovation in the changing world of VFX.
Conclusion
As we finish this guide on VFX compositing, let’s think about what we’ve learned. Knowing the basics of visual effects is key for artists. It helps us tell stories better by blending reality and fantasy.
We’ve seen how important lighting and tracking are. We also learned about the best software to use. By trying new things, we grow as artists and create amazing visuals.
The world of VFX compositing is huge and exciting. Together, we can make new things possible. Let’s keep making and pushing the limits of digital stories.